The electronic visa on arrival (e-VOA), also known as the B1 visa, is perfect for tourists. You can easily apply for it online without needing to visit an embassy. If you plan to stay in Bali or Indonesia for no more than 60 days, this visa is ideal for you.

About the B1 e-VOA
The B1 visa is available to citizens of 97 countries. It allows you to stay for up to 30 days, with an option to extend for another 30 days. The application fee is 500,000 rupiahs, and the extension costs the same amount.

The visa allows you to engage in tourism, visit friends or family, and attend meetings, conferences, and exhibitions as a visitor.
You must not stay in Indonesia beyond the validity of your residence permit, engage in prohibited activities, fail to comply with visa conditions, or break Indonesian laws. Doing so may result in fines, deportation, and/or other legal actions. Additionally, you cannot sell goods or services, or receive any compensation or wages from individuals or companies in Indonesia.
You must follow the laws and regulations, respect local customs, culture, and lifestyle, and have sufficient funds for your stay in Indonesia. Typically, this means having $2000, but no proof of funds is required for the application process.
Required documents
- Passport valid for at least 6 months.
- Ticket out of Indonesia.
To extend the visa later, you'll need to create a personal account on the immigration website. It's worth registering and creating your account right away. Remember, each family member or group member needs to have their own personal account.

Keep in mind that, according to the recommendations of the main immigration office of Indonesia, you can submit an e-Voa application no later than 48 hours before your trip.
Now, let's break down step by step the process of obtaining thvie e-VOA.
Step-by-step process of registering a personal account
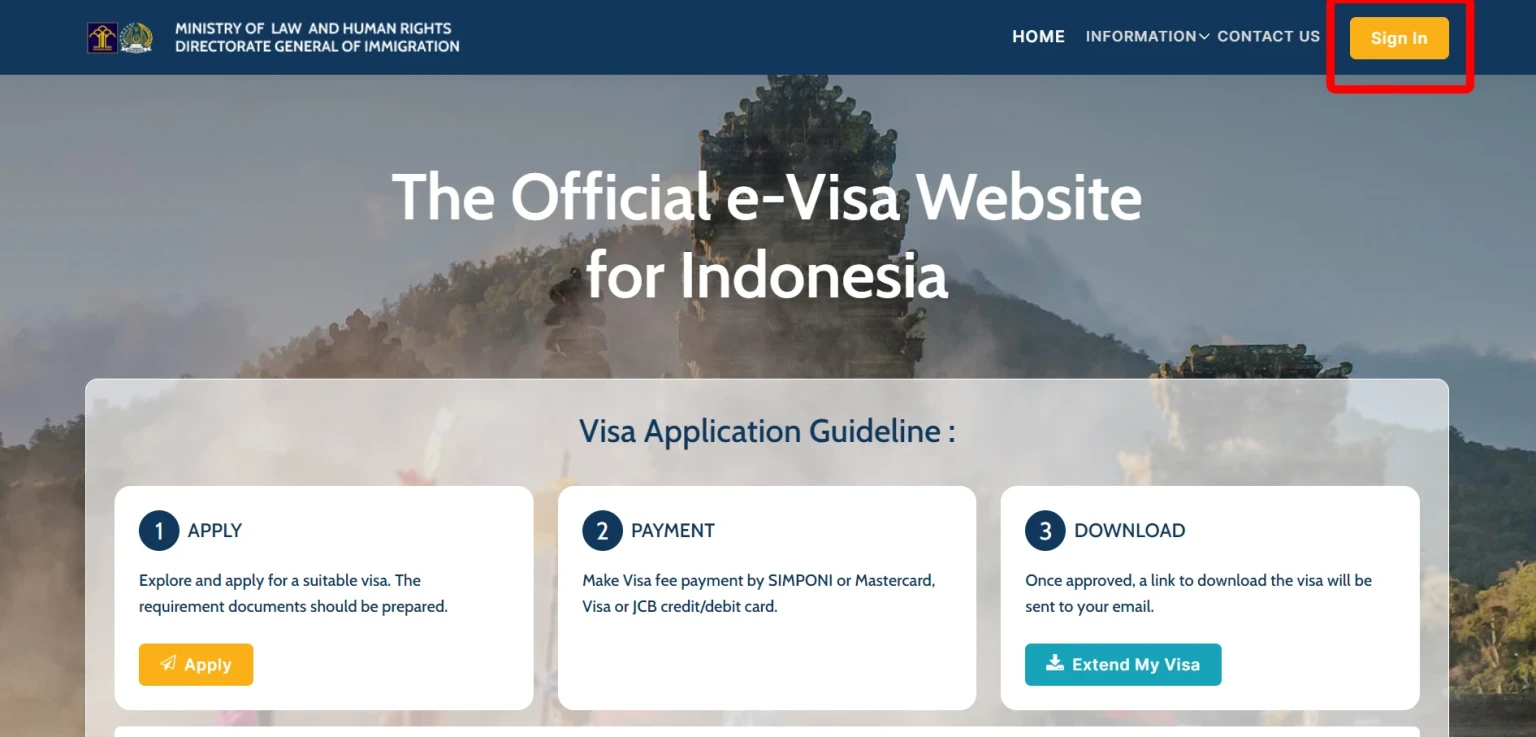
1. Go to the immigration website.

2. Click on "Sign in" to register. In the next window, select "Create account."

3. Choose "Foreigner" on the following page.

4. Upload a clear photo or scan of the main page (only one page) of your passport and your recent photo. Ensure both images are in JPEG, JPG, or PNG format with high quality, avoiding blurriness and pixels. They should be in color, with your photo having a resolution of at least 400x600 pixels.
5. Complete the form, providing details exactly as in your passport. Verify all information before submitting, as the website is known to alter details, like the passport issue date.
6. Create a memorable password for the immigration website in the email section.

7. Click "Submit," and a confirmation email will be sent to you.
Congratulations! Your personal account is now set up.
Step-by-step guide to applying for a B1 e-VOA visa
1. Return to the homepage and click "Sign in." Enter your email and password from the previous step.
2. Once logged in, click "Apply."

3. From the dropdown menu, select your country of citizenship,
4. Choose the purpose of visit between "General," "Family or Social," "B1 Tourism," and "30 days", and click "Detail & Apply."


5. The website will display a window with visa information. Click "Apply" again.

6. Upload your passport photo (only the main page) and a personal photo. Ensure they are clear, without extra objects, and presented horizontally. Your personal photo should be at least 400x600 pixels and not exceed 2MB. Click "Next."

7. Fill out the form. For the Indonesian address, provide the following information:
- Residence Type: Type of accommodation (house, hotel, villa, apartment, etc.).
- Address: Copy it from Google Maps. The remaining fields should fill automatically. If not, enter:
- Postal Code (5 digits).
- Province: likely Bali.
- City, District, Village: Enter according to the address from Google Maps. For example: Jl. Bypass Ngurah Rai Jimbaran No.88A, Tuban, Kuta Sel., Kabupaten Badung, Bali 80361.
8. Next, you'll need to upload a PDF of your recent photo in PDF format. You can convert it using Photoshop, or if you have an iPhone, you can create a PDF using the Notes app by creating a new note, tapping the camera icon, and selecting "Scan Documents."
9. You also need to upload your return ticket from Indonesia in PDF format. These tickets are usually sent to your email in PDF, so this should not be an issue.
10. In the next window, you'll need to check the information you previously entered. Carefully verify each item and check the boxes where the information is correct. Then, click the "Save" button at the bottom of the page.

11. Cick "Submit," and the website will notify you that your application is awaiting payment.
12. Click on the number under "Transaction number." At the top of the page, review your information again for any typos or inaccuracies. If everything is correct, click "Make a Payment" at the bottom of the page.

13. Proceed with the payment. The card used for payment doesn't have to be in the traveler's name.

Visa processing time is around 30 minutes.Once your application is processed, its status will change in your personal account, and you will receive an email with your electronic visa and a payment confirmation.
It is a good idea to print a copy of your electronic visa just in case.
Now you're ready to fly to Indonesia!
At the airport in Bali, look for the e-VoA sign and head to the designated passport control counters for electronic visa holders.

You can add one right now!